Visual Studio .NET1. Set headers and libraries pathOpen Tools->Options->Projects->VC++ Directories, add path to HGE "include" directory and move it to the top: 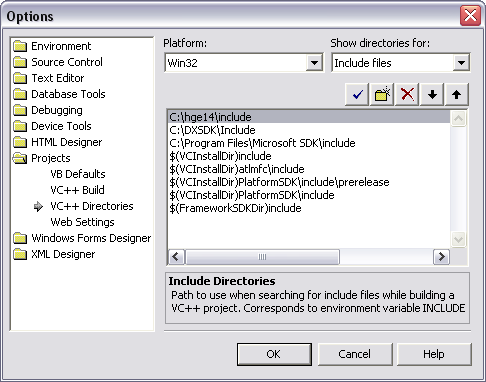 On the same tab select Library files from the Show directories for dropdown list, add path to HGE "lib\vc" directory and move it to the top: 
Press OK.
2. Create blank Win32 Application projectOpen File->New...->Projects dialog tab, select Win32 Project, type in your Project name and Location: 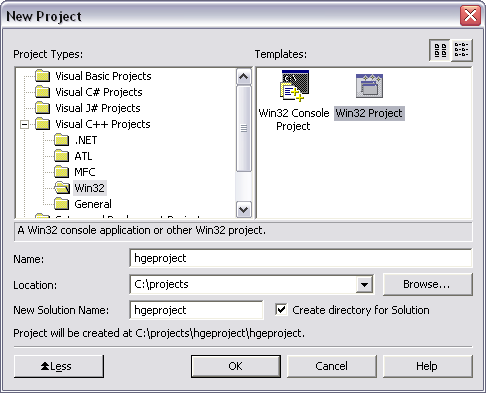
Press OK.
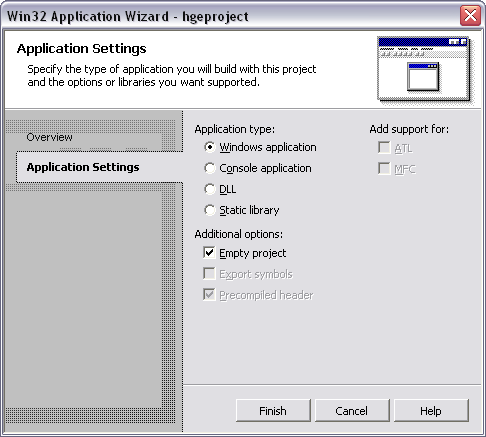 Press Finish. Voila! You have the project created now. 3. Add libraries to the projectOpen Project->Properties...->Linker->Input and add to Additional Dependencies the following libraries:
If you don't call any Windows functions, these two are the only libraries required. 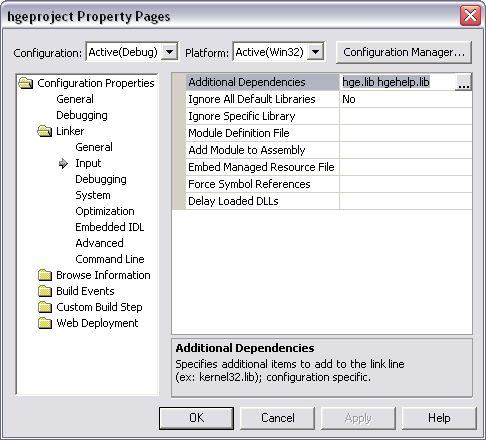
Then select Release from the Configuration dropdown list and repeat the operation.
4. Start coding!
Include hge.h to access HGE functions. See Tutorials section for basic code examples. |